Add the Channel to Your Roku
Open the link below in a browser — on your phone, computer, or tablet — while signed in to your Roku account. The channel is added to your Roku Home screen instantly.
Or search "Stalker Portal IPTV" directly in the Roku Channel Store on your TV. The channel is free.
Launch the Channel

Find Stalker Portal IPTV on your Roku Home screen and press OK to open it.
On first launch, the app tries to connect but has no portal configured yet. You will see the Portal Profile Error screen — this is expected. Press OK on Go To Profile to open settings.
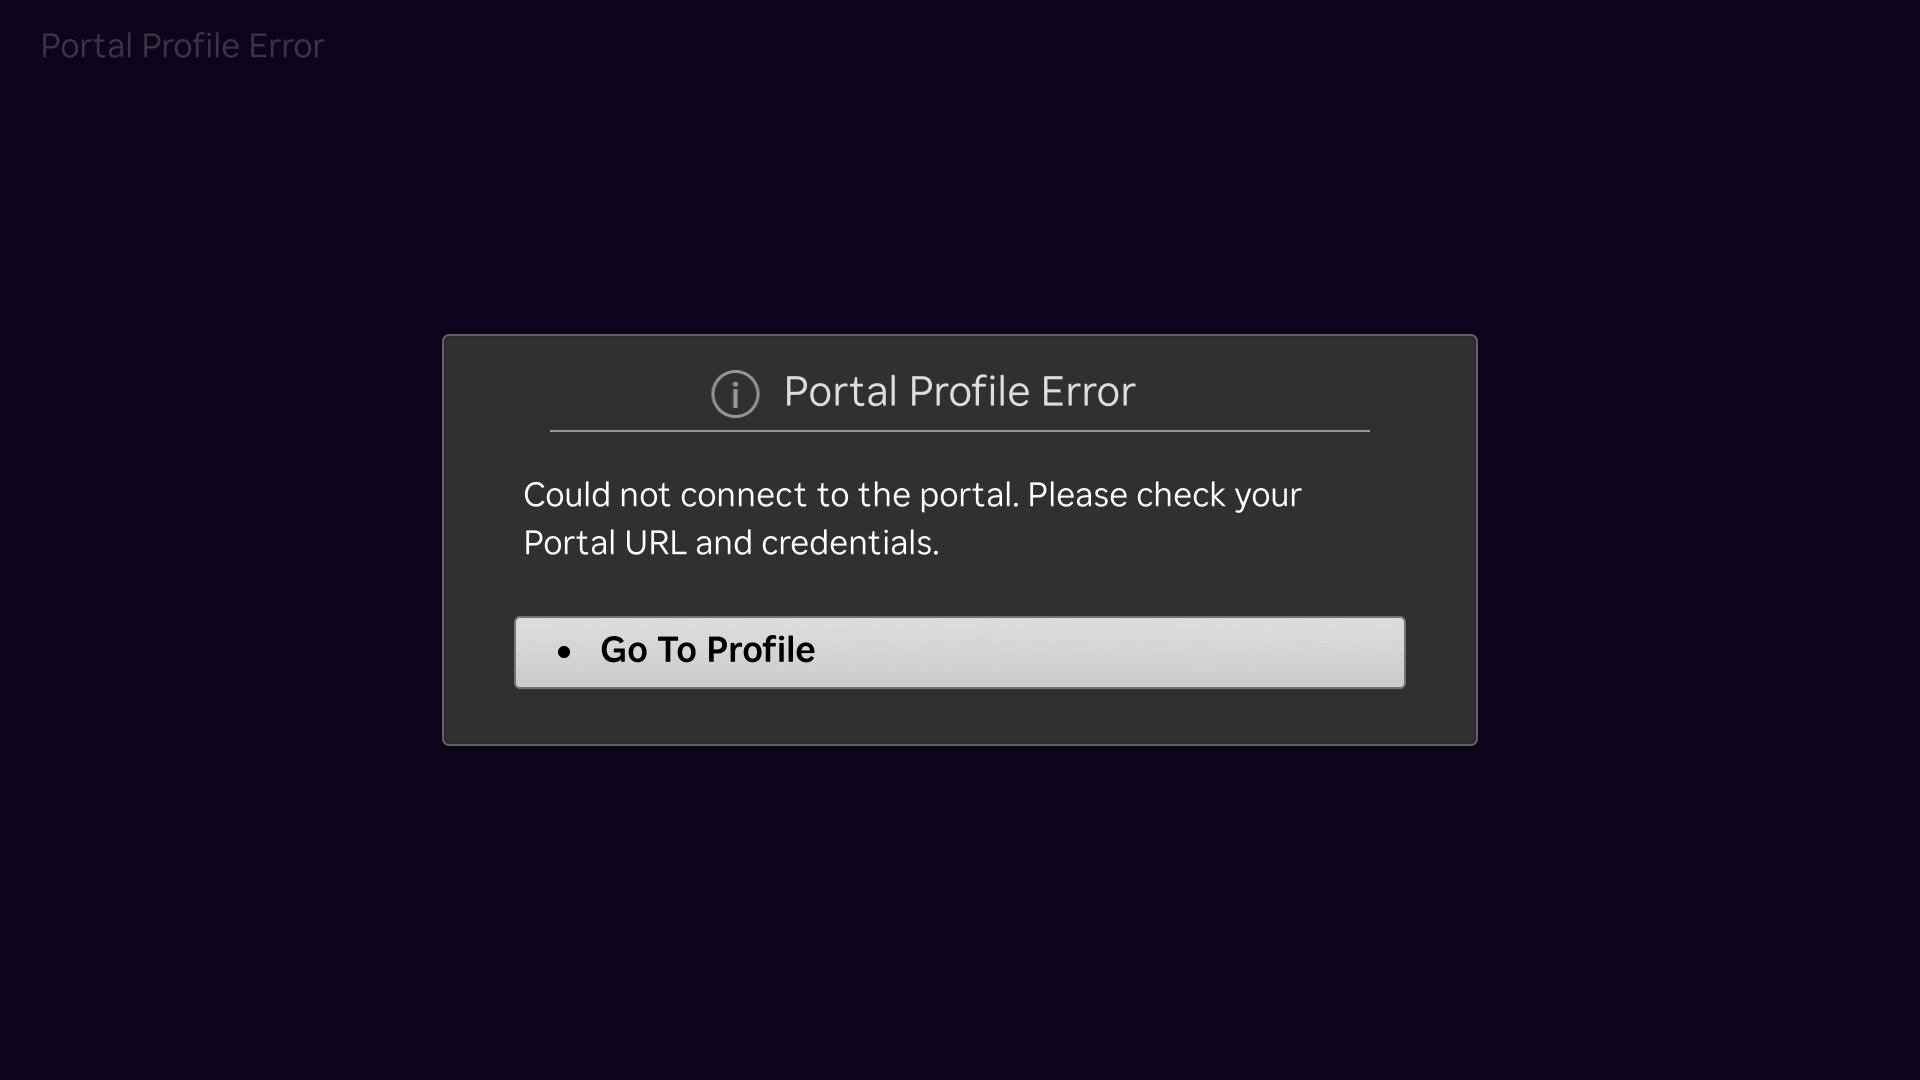
Already past this screen? Press the ★ (Star) button on your Roku remote at any time to return to settings.
Configure Your Settings
During the first run, your profile setting will not be set.
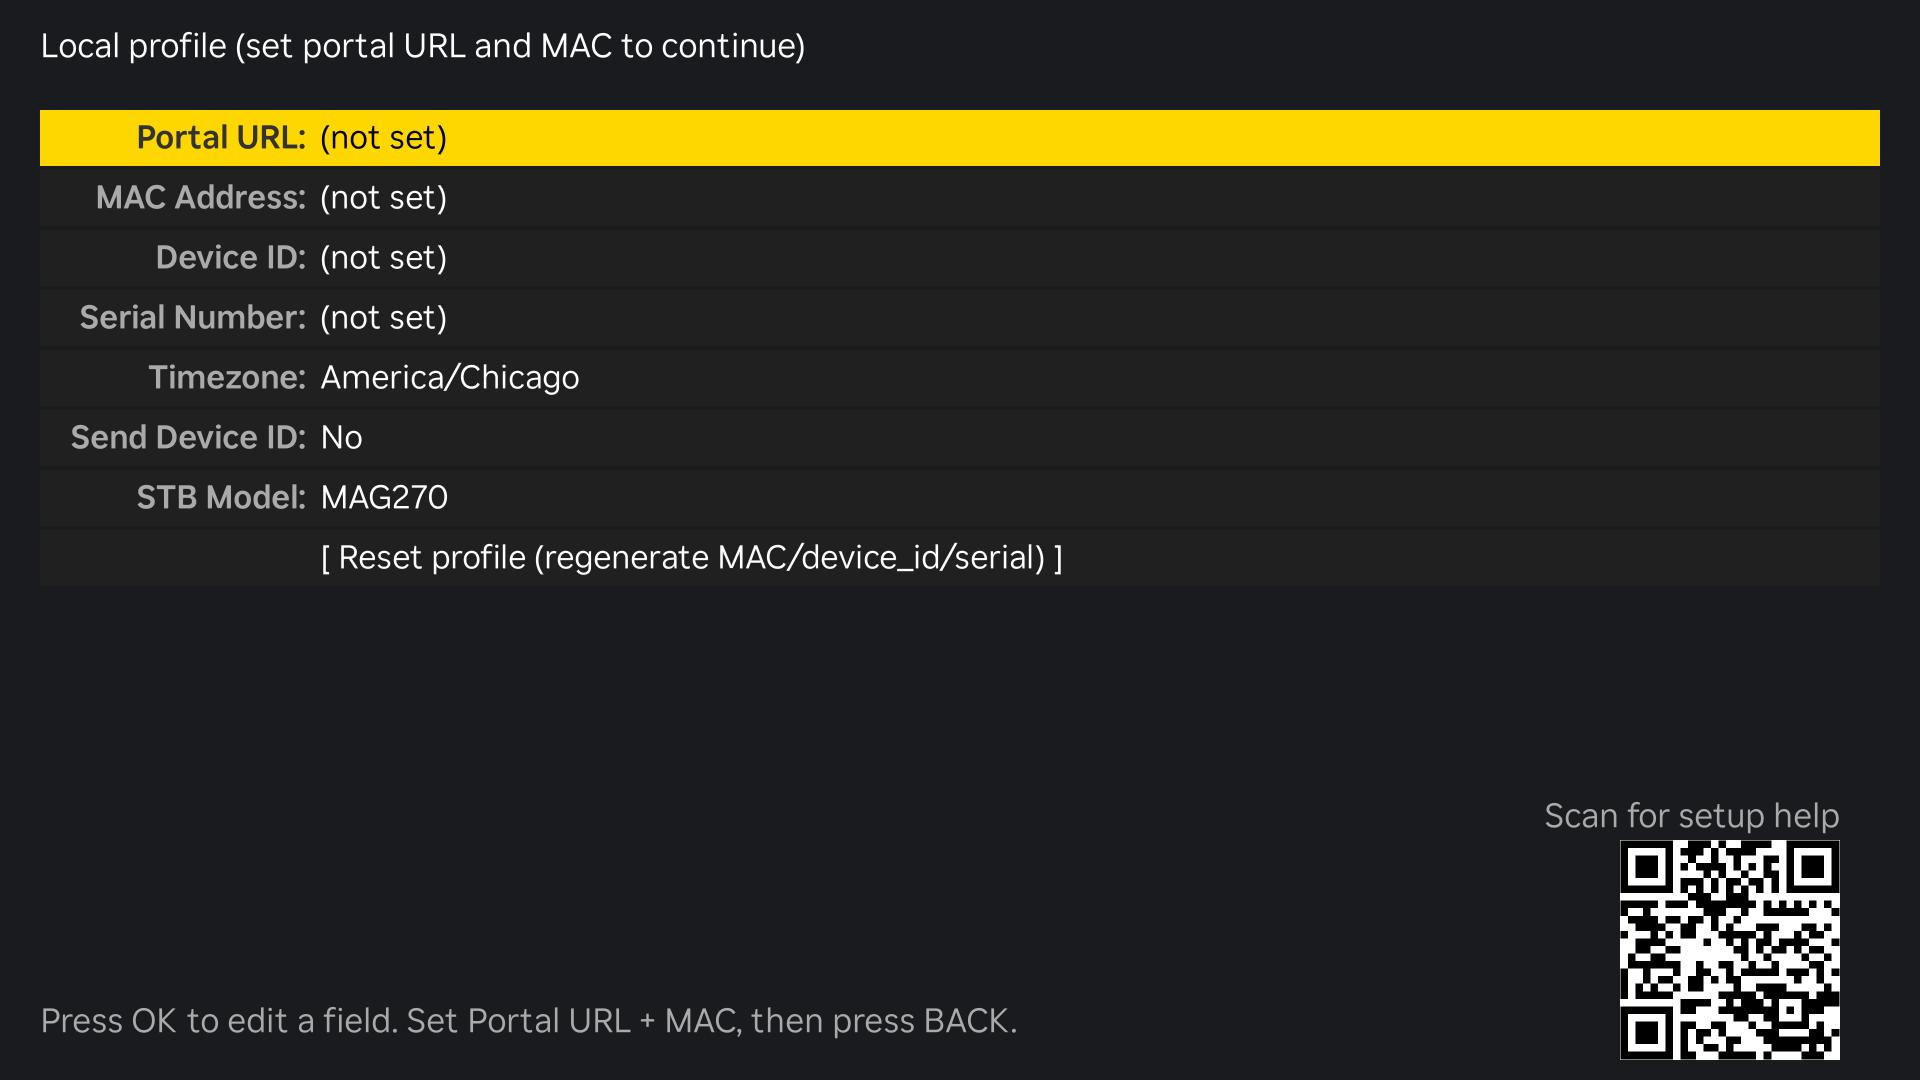
You will need to scroll down and select the [Reset Profile (regenerate MAC/device_id/Serial) ], to pre-fill the data to be given to your provider.
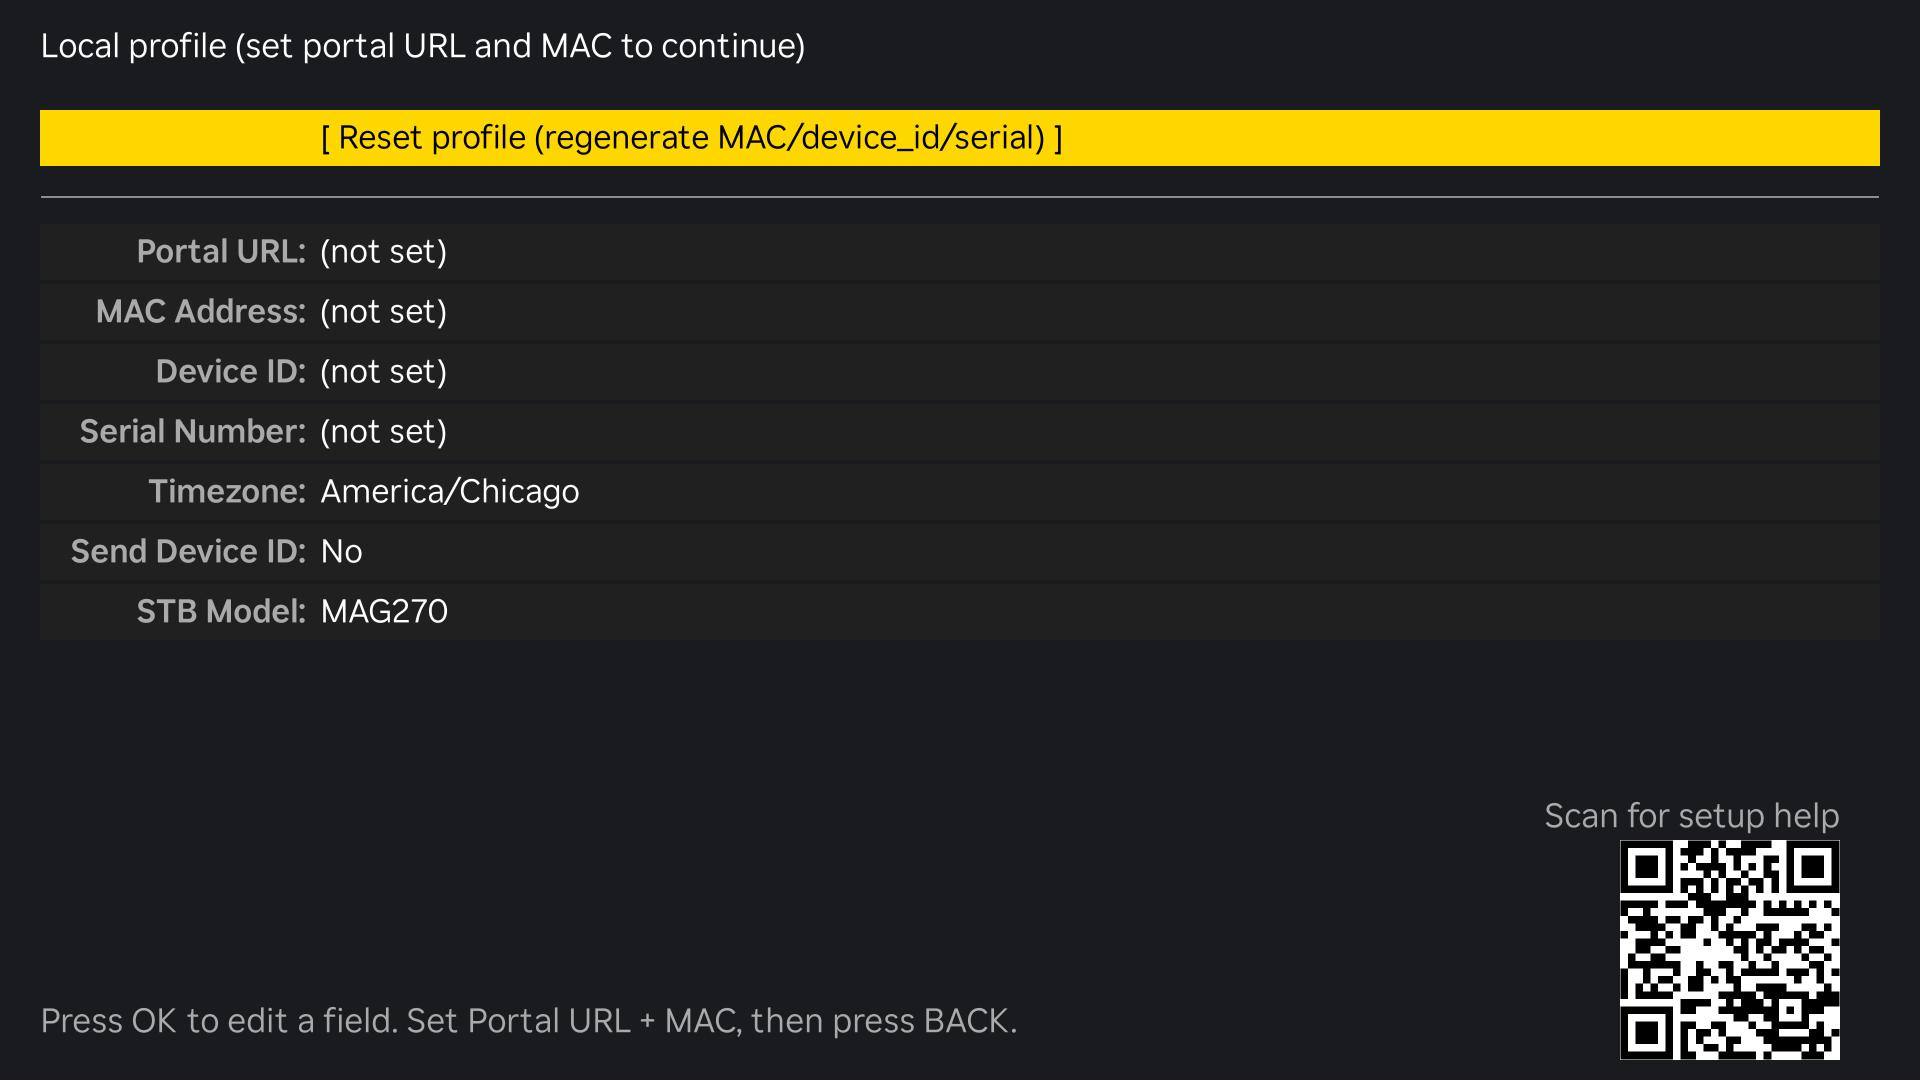
The settings panel lists every field the app uses to connect. The row highlighted in yellow is your current selection. Press OK to edit a row. Press BACK when you are done — the app saves everything and immediately tries to connect.
Most users only need two fields: Portal URL and MAC Address. Everything else is auto-filled and works without changes.
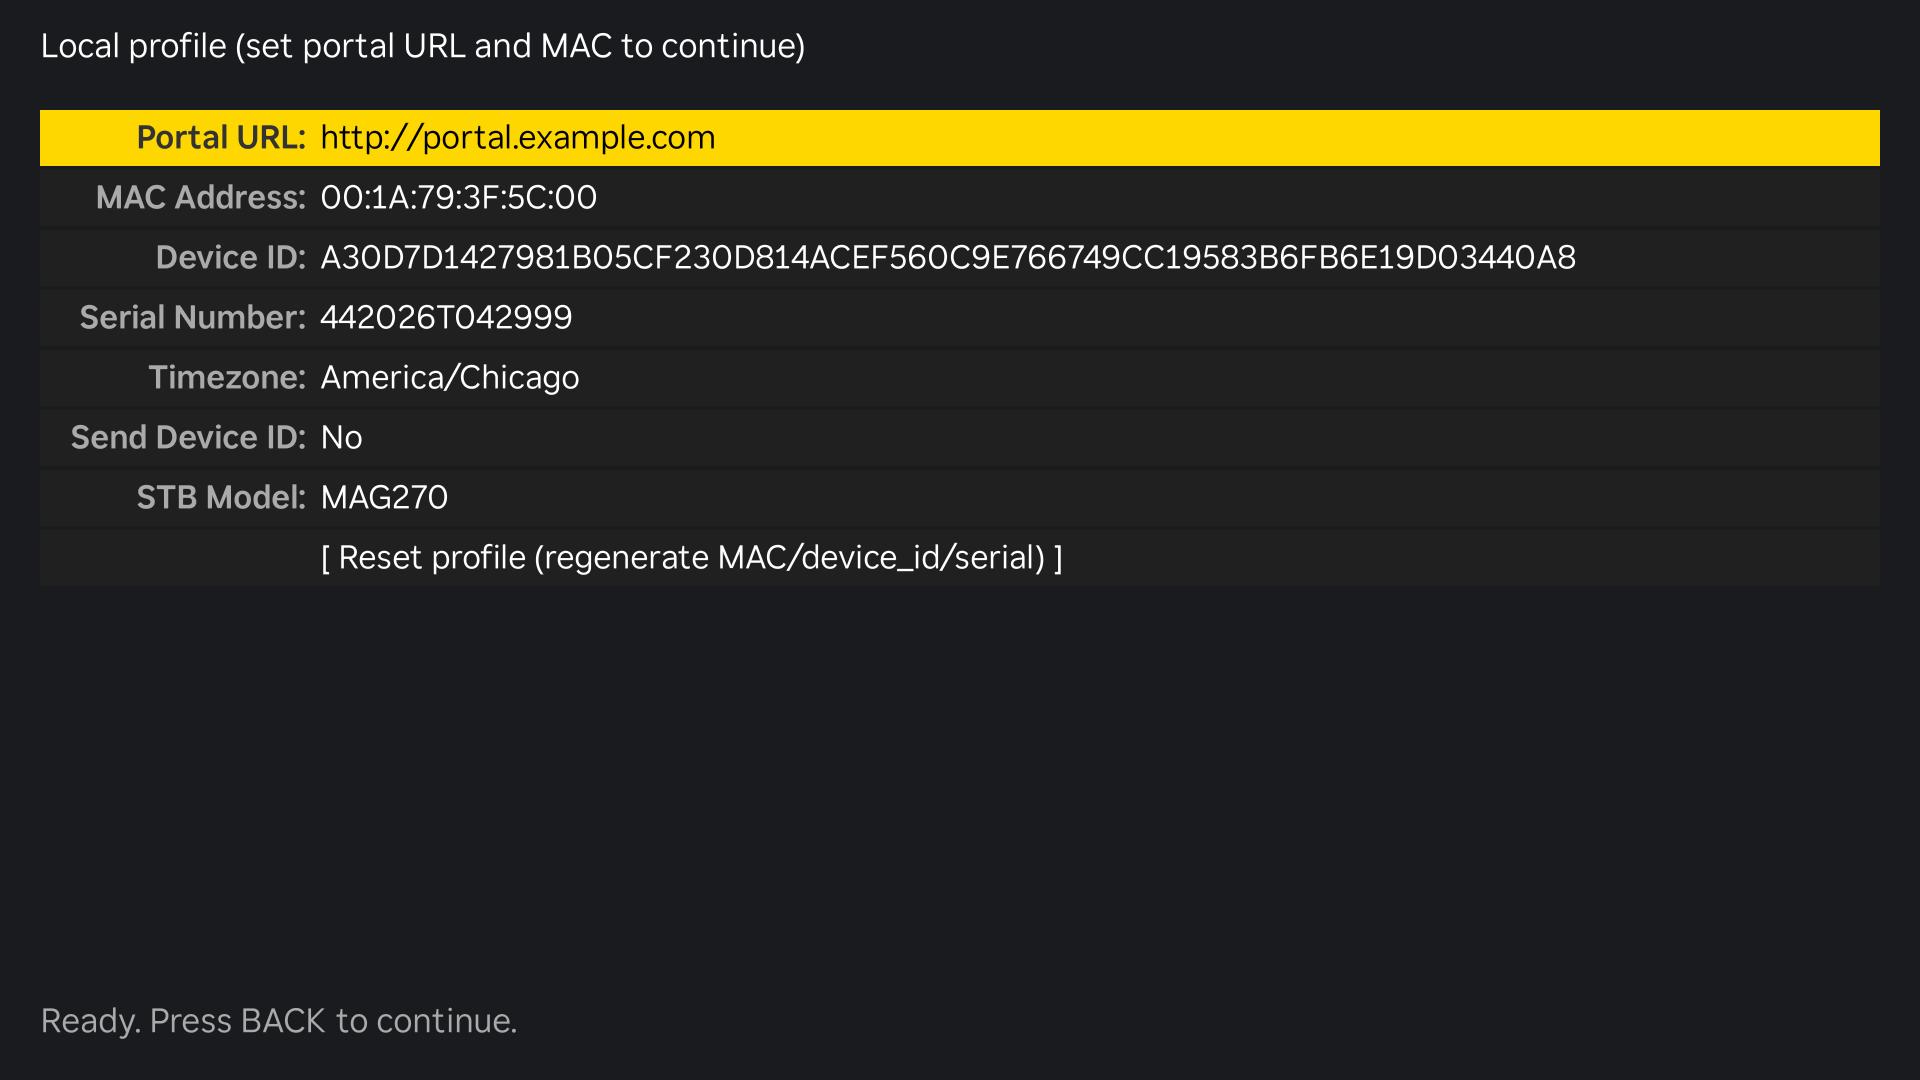
New subscriber? Check your MAC Address first — copy it and send it to your provider before entering the portal URL. They need to register it to your account.
Save and Connect
Once you have entered your Portal URL and confirmed your MAC Address, press BACK on your Roku remote.
The app saves your settings and connects to the portal. A successful connection takes you to your content library. If it fails, the Portal Profile Error screen returns — check the Troubleshooting section below.
Settings Reference
Every field, explained.
Portal URL and MAC Address are the only fields most users touch. The rest are auto-generated and correct out of the box.
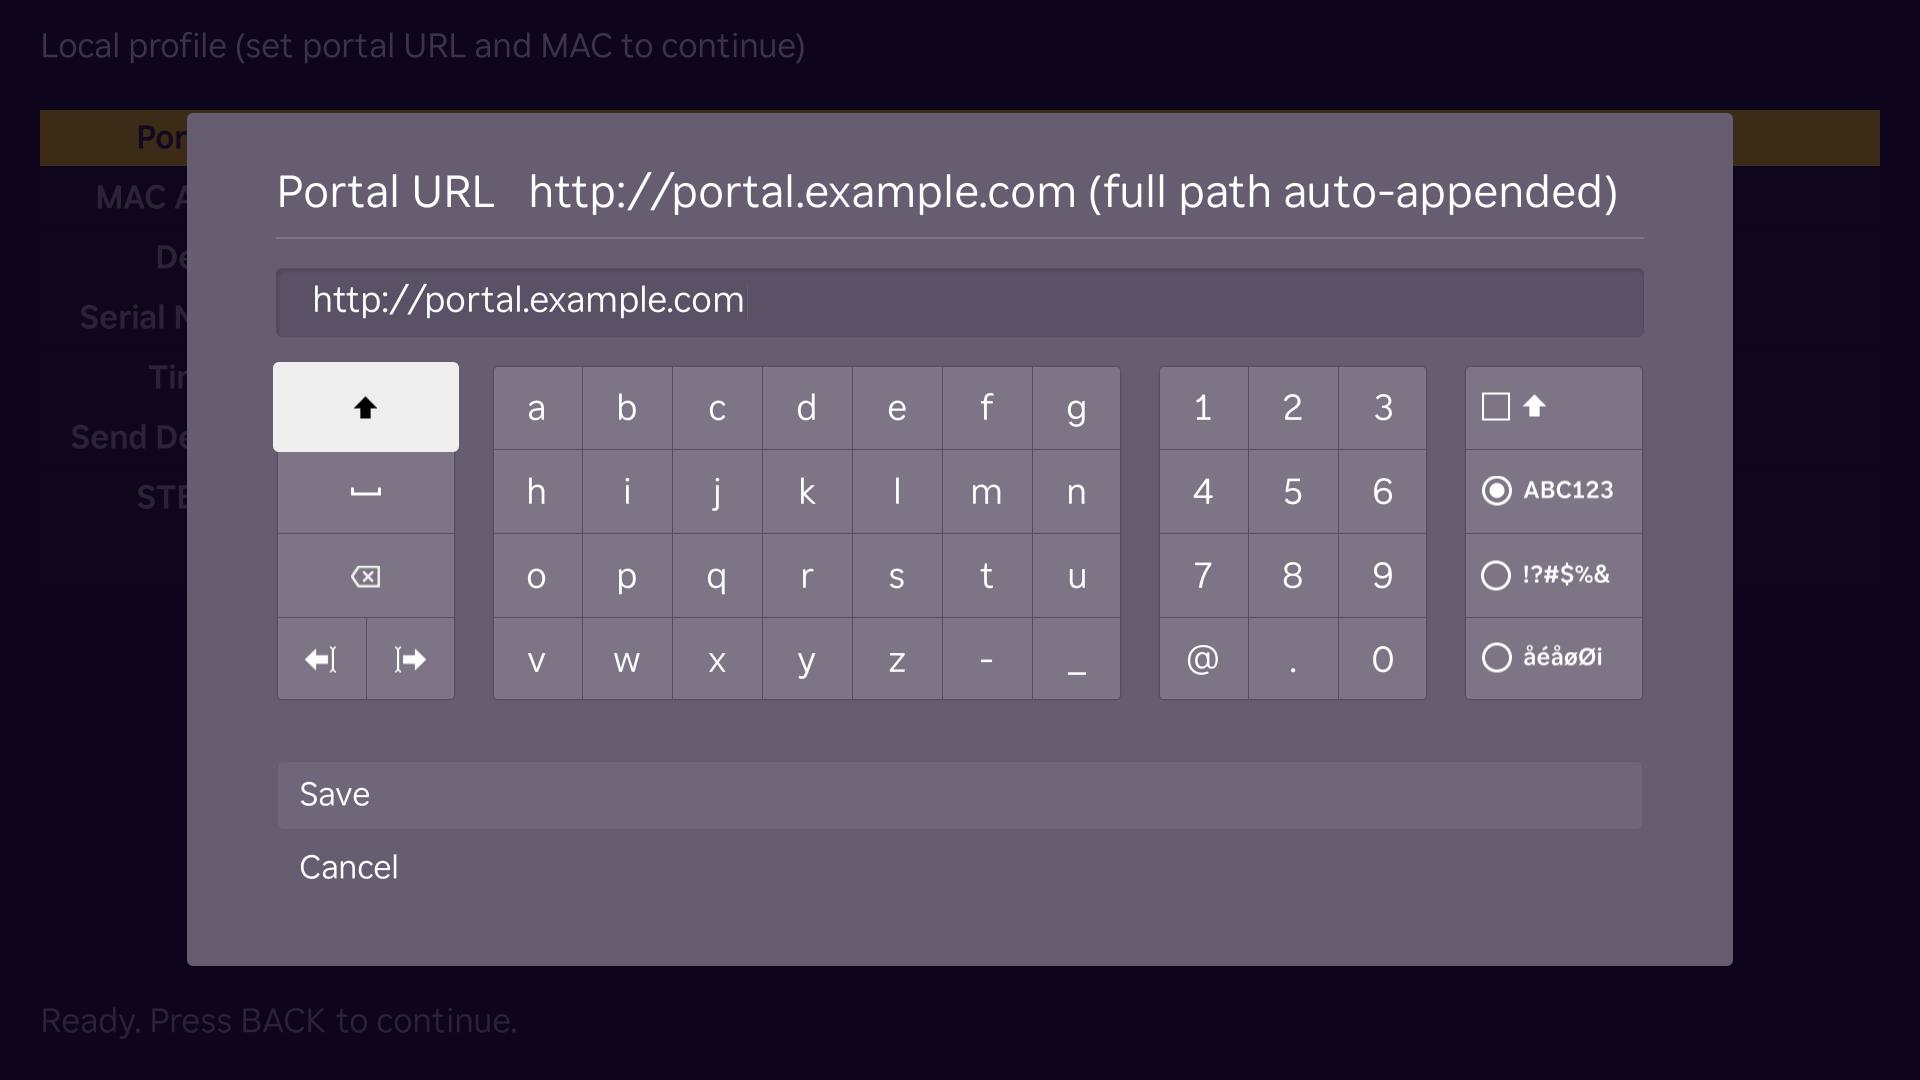
The address of your IPTV provider's server. Your provider gives you this URL when you subscribe. Enter only the base address — the app appends the full Stalker API path automatically.
http://portal.example.comNot sure? Ask your provider for their "Stalker portal URL."
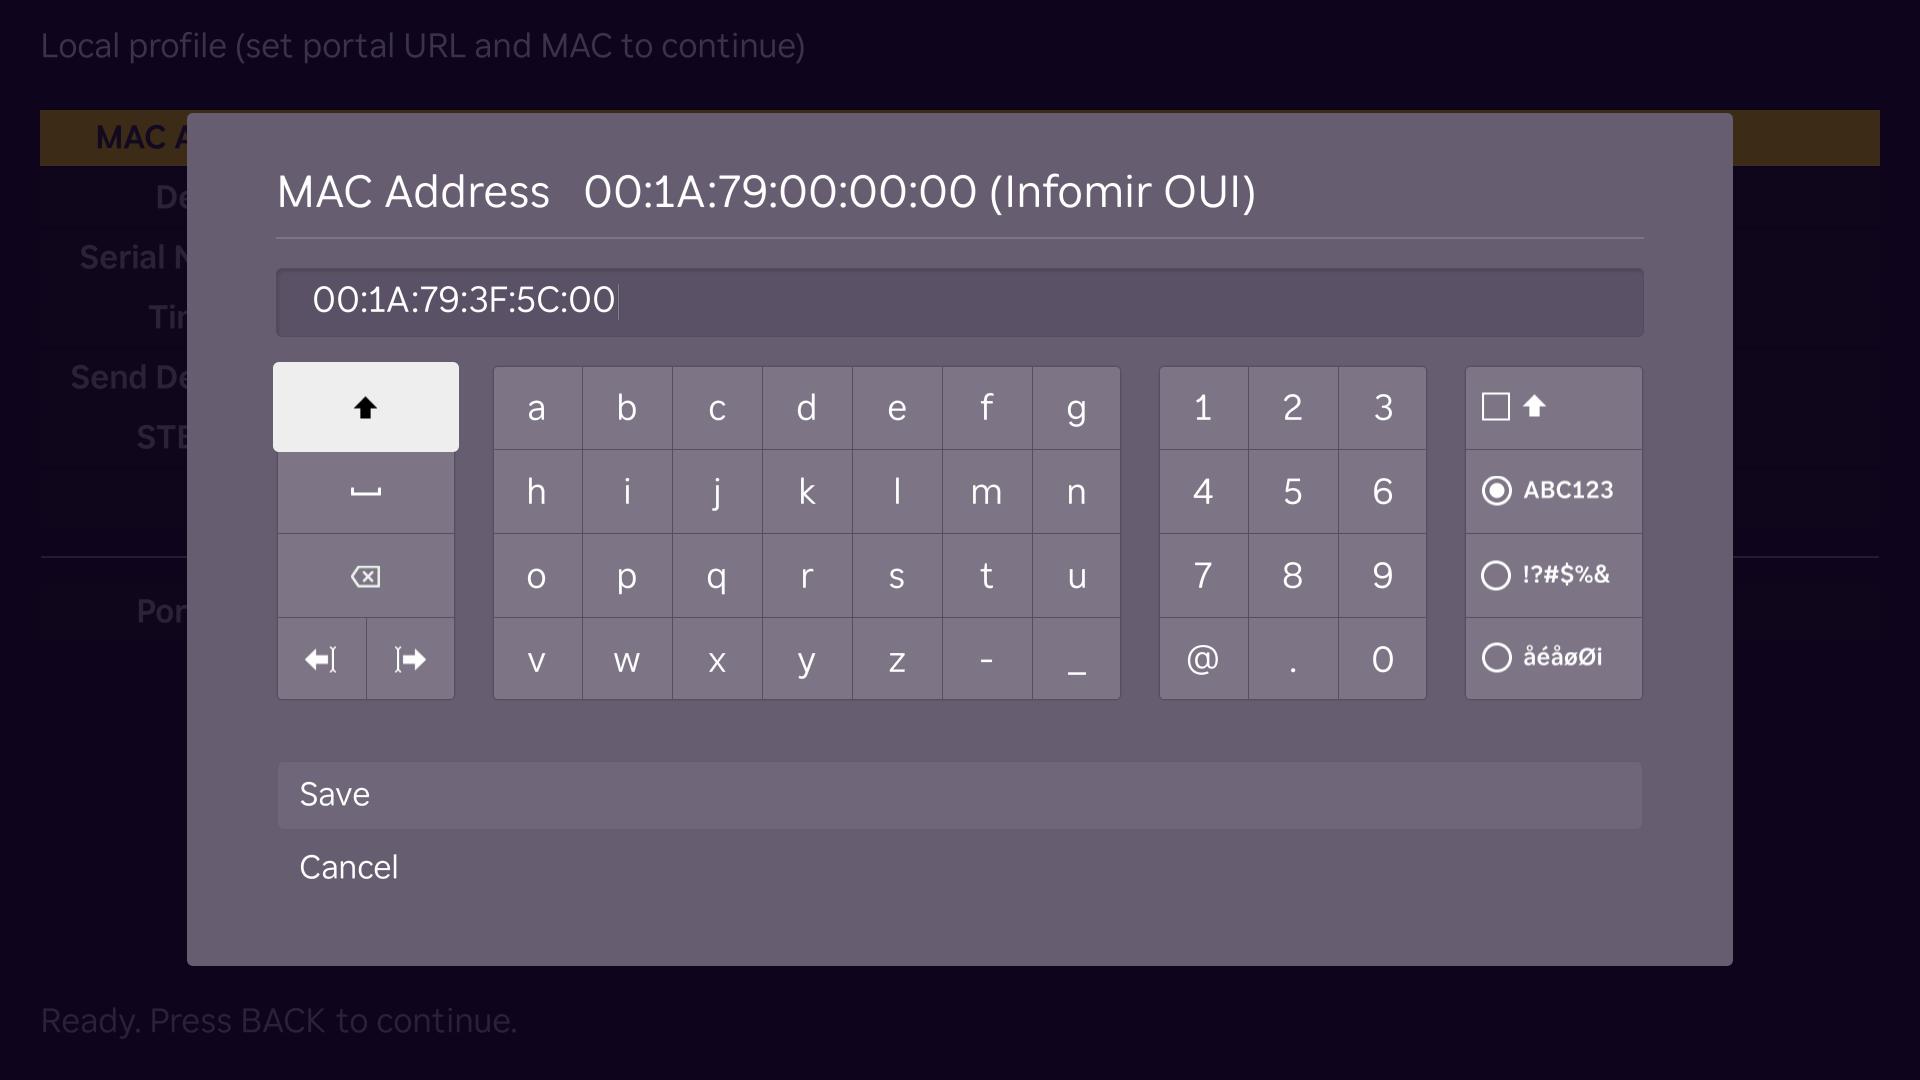
The identifier your IPTV provider uses to link their subscription to your device. The app auto-generates one on first run using the Infomir prefix (00:1A:79:…).
New subscriber: Copy the MAC shown here and send it to your provider before entering a portal URL — they register it to your account and give you back the portal URL.
Switching devices: If your provider already registered a MAC from a previous device, enter that one here instead.
A 64-character SHA-256 identifier derived from your MAC address. The app generates and keeps this in sync with your MAC — there is nothing to type here.
A device serial number in standard Infomir format, generated automatically from your device's hardware identifiers. Leave it unchanged unless your IPTV provider gives you a specific serial to enter.
Your local timezone, used to display EPG (programme guide) times correctly. Auto-detected from your Roku's location setting on first run.
Only change this if the guide shows the wrong times.
America/Chicago · Europe/London · Asia/KolkataControls whether the Device ID is included with every request to the portal. Default is No. Most portals do not require it.
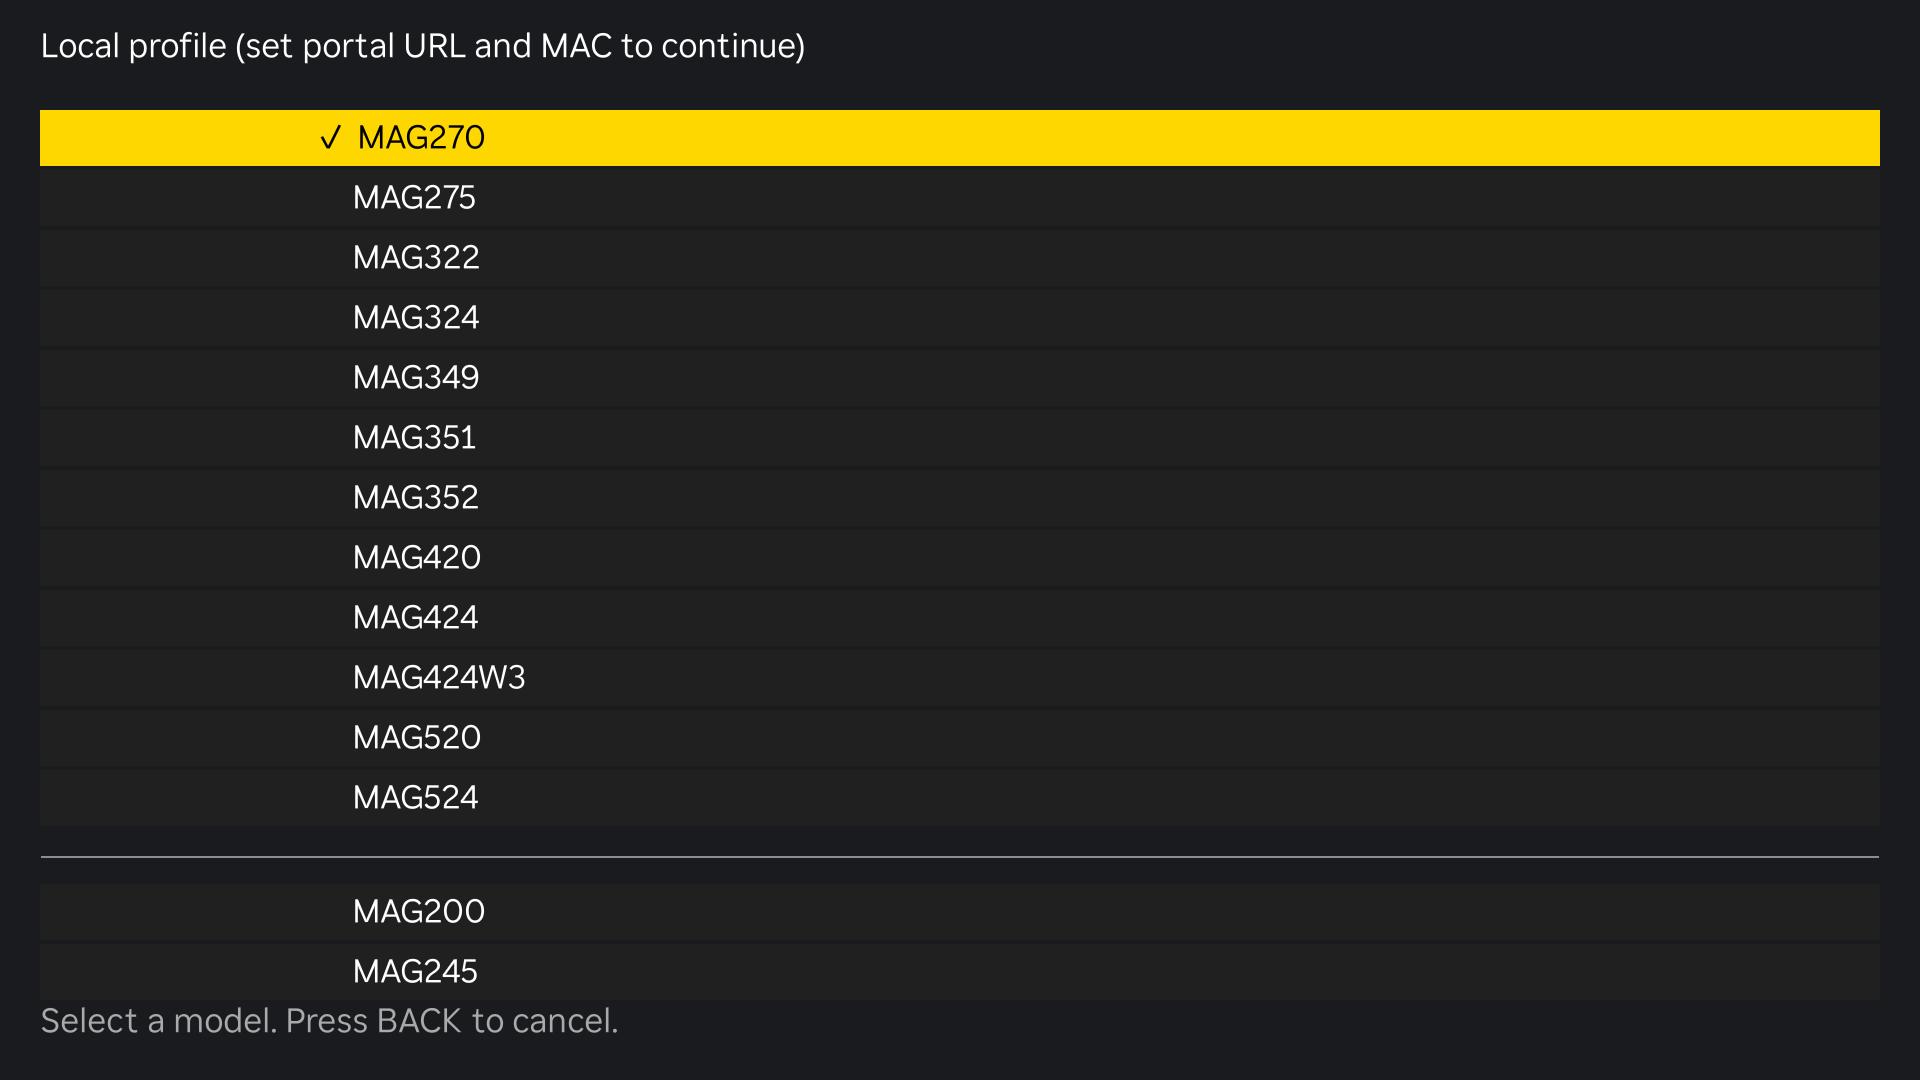
The set-top box model the portal thinks it is talking to. This affects how the portal authenticates and serves content. The default (MAG270) works with the vast majority of providers.
If your provider specifies a particular MAG model number, press OK to open the picker and select it.
Regenerates your MAC address, Device ID, and Serial Number with fresh random values. Your Portal URL is kept.
Searching for Videos
How to search
Search is available only in the Video section and not on Live TV. To search for a video, navigate to the Video section, choose a genre / sub-category, and once you are on that genre page press * on your Roku remote. This will bring up the on-screen keyboard for typing. Once your search keyword is entered, scroll down and press OK / Enter to see results.
Troubleshooting
Something not working?
http:// or https://Asia/Kolkata)